
Thanks for joining us for Week 1 of the OUTFIT health + fitness 6-week core strength program.
For more information on the origins of this program and Core strength vs Abdominal strength check out our intro blog or for a more detailed look at some Core & abdominal anatomy
Week 1 starts with 5 main exercises;
- TA activations
- Leg lifts (and /or leg lowers)
- Hip Extensions
- Alternate arm & leg raise
- The plank
We also need to understand 2 key principles of core training. How to activate the TA & the importance of maintaining a neutral spine.
Activating the TA
The Transverse abdominus (TA) is the deep core muscle wrapping around the abdomen that is crucial for developing the strong core for powerful movement & control. To feel your TA place your fingers 2-3cm inside of your hip bones at the front (your iliac crest) and cough. You’ll feel the deeper TA muscle turn on. Now without coughing, draw your belly button towards your spine to activate the TA. You should draw your abs in a few cm (but not totally draw your stomach in) and keep breathing. Activating the TA to a med level is enough. To start with the key learning for week 1 is to feel what your activating and know how to consciously turn on the TA. It’ll become even more important with more advanced exercises. Exercise 1 of our program today is TA activations. For those new to this hold it for 3-5secs. If you can maintain a longer hold do repeats of 10sec holds
Many fitness experts of different ways of describing how best to activate your TA so here is another great description to ensure you get this key element of the program.
Laura suggests; Place one hand gently on your stomach without pushing into it. Now take a deep breath in through you nose into the lower portion of your ribcage, as you breath out through your mouth think of pressing your navel gently into your spine, as though you had a string attached to it and someone was pulling it from behind you. You’ll feel how your stomach moves away from your hand. So whenever you contract your TA voluntarily it should feel like if you were tightening around your waist, while still breathing comfortably. Think of it as if you are wearing a corset around your waist that is tight enough to help you stabilize you spine and pelvis, but not too tight so that you can’t breathe properly.
Maintaining, or understanding what is Neutral spine is also a key element for core development. Standing, or lying down, tilt your pelvis forward, this will increase the arch through your lumber spine. Tilting your pelvis backwards will flatten your lumber spine. Neutral spine will be between these two points. It’s important you are aware of these positions & can find your neutral spine. It’s also a great mobilisation activity to help release a stiff back.
I often use the measure of whether you can maintain neutral spine as a guide for whether someone should progress to a harder exercise. If you can’t maintain a neutral spine you’re placing excessive load on your back & recruiting other bigger muscles (normally used in limb movement for example) to assist. We’re better off regressing & mastering a introductory exercise before going for the advanced version.
So now you’ve switched on the TA, mobilised your lower back & found your neutral spine it’s time to get started.
Complete this program 3 times through the week & on a separate 4th day record your maximum plank time (that you can hold perfect form!). I’m doing mine on Friday.
- TA activations x10 (3-10s hold)
- Leg lifts x20 each leg
- Hip Extensions x10 10s hold
- Alt. arm & leg raise x10 each side (5sec hold)
- The plank 3x 30-60s
Our first Exercise is the TA activations. As written above begin with 3-5sec holds, or progress to 10sec holds.
For the Leg lifts lay on your back, both feet on the floor & find your neutral spine. Activate your TA & slowly lift 1 leg off the ground, take it up to table top, where your lower leg (shin) is horizontal, and then slowly lower back down & repeat for the other leg. Remember maintain neutral spine & control the movement. To complete the 20 leg lifts it might be necessary to stop & take a break after 5 or 10. It’s much better to go slow with breaks & reset your core so you can maintain core control & improve TA activation & endurance. Slow & steady!!
For our 3rd exercise the Hip Extension lay on your back with feet flat on the floor, no more then 30cm past your gluts, & shoulder width apart. Push through your heels & raise your hips into the air so you’re straight from your shoulders through your 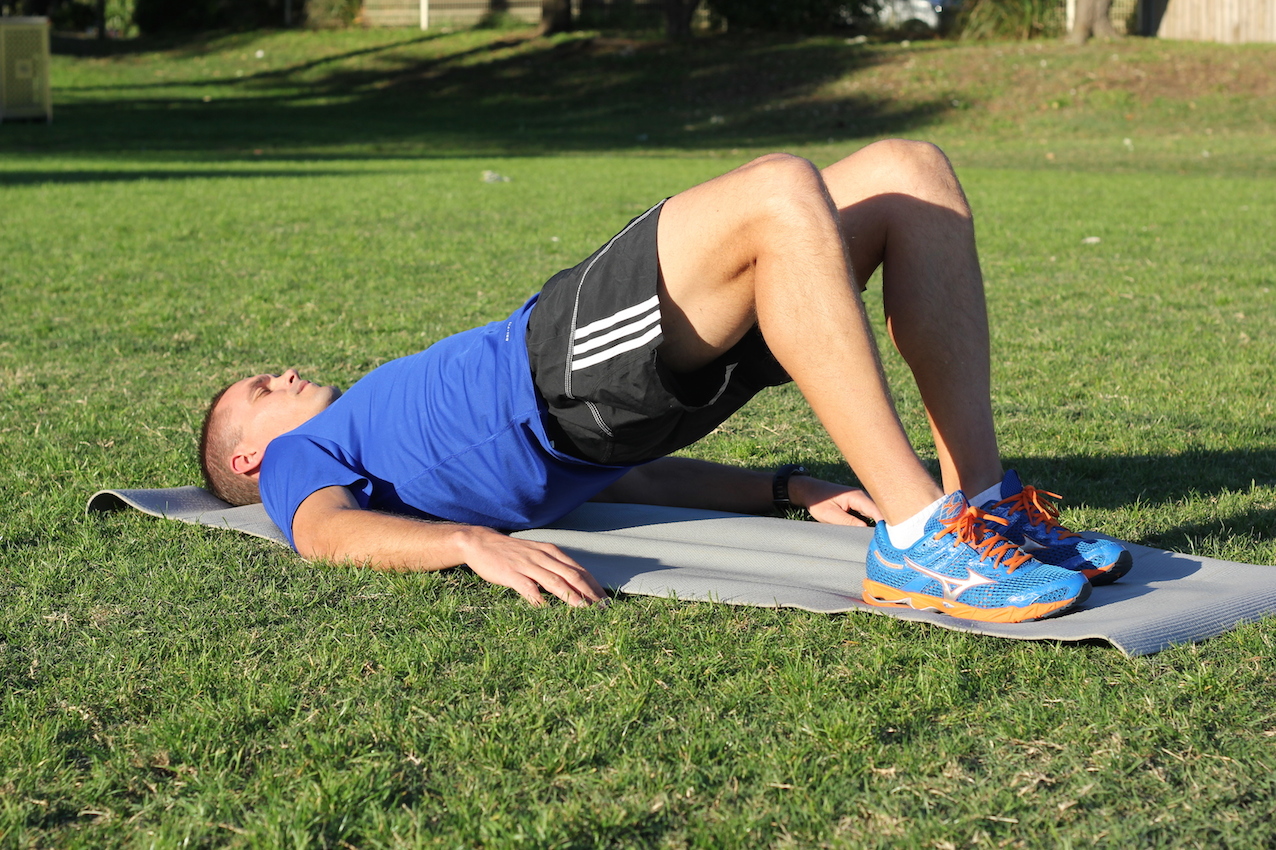 hips & to you knees. Like this picture here (when I was a bit more agile). It’s a hip extension as you lift or extend your hips, but don’t over-extend or arch your back. The movement is generated form your gluts (another key element in pelvic & core control) so use these powerful muscles to slowly lift your hips up & hold for 10s. Try to activate your TA in this position as you begin to lift your hips off the ground.
Alternate arm & leg raise starts on all fours and slowly raises opposite limbs. Hold at the top for 5s and activate your TA at the top. You’ll also feel the 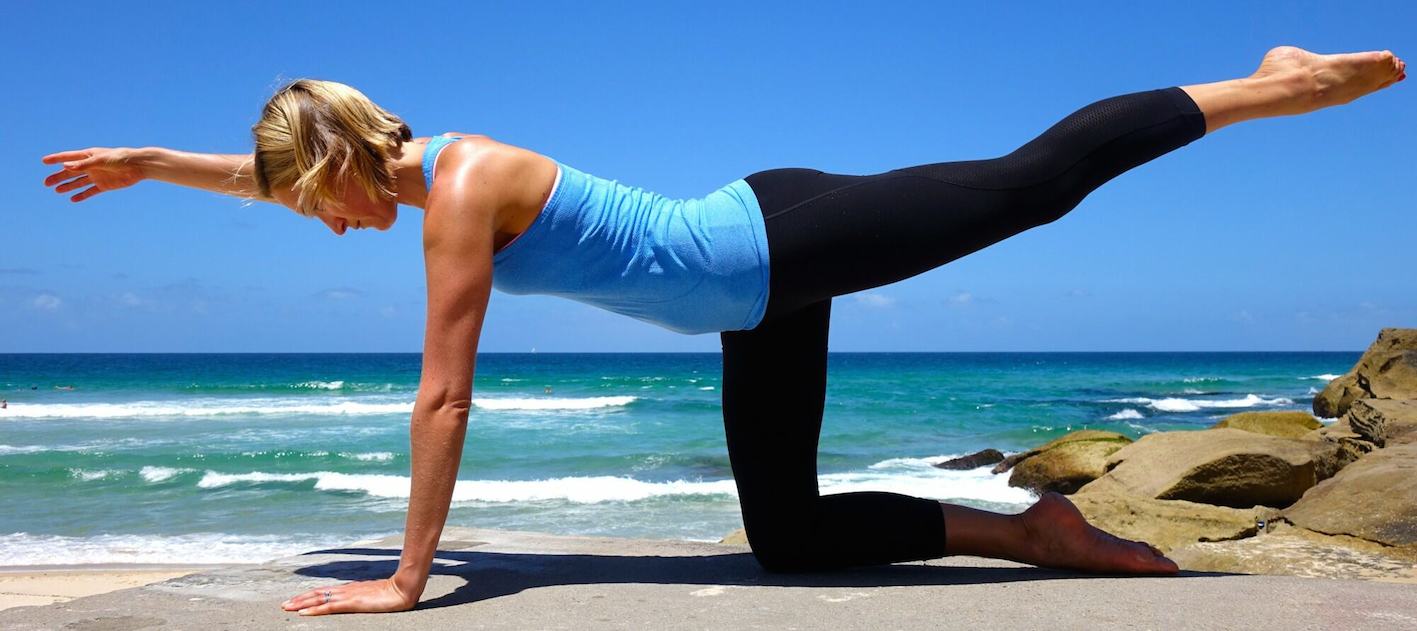 long muscles of the back & gluts firing. Rachel demonstrates percetly in this photo.
Finally the Plank. You probably all know it well, and that’s good. But this program is about going back to basics so let’s get things right from the start. TA activation is key so let’s concentrate on this as you come up into the plank. Also make sure your shoulders are above your elbows, not sliding backwards. This will make it easy to have your feet perpendicular the ground. If you feel like your sliding backwards bring your shoulders forward & lighten the load on the feet. Start with 3x 30s planks with perfect form. Only go longer if you’re certain you’ve got the form correct.
That will have taken about 10mins to complete & you should hopefully feel a good connection between the muscles of the core & an understanding of exactly what you’re doing to control each move. Next week we’ll move onto more advanced moves so make sure you complete the Week 1 workout 3 times this week & the maximum plank.
I need to thank several fitness experts including our Pilates Instructor Laura Lo Bianco, Rachel Kinder & fitness trainer Ewan Seaford for their input.


Speak Your Mind